Access Plesk
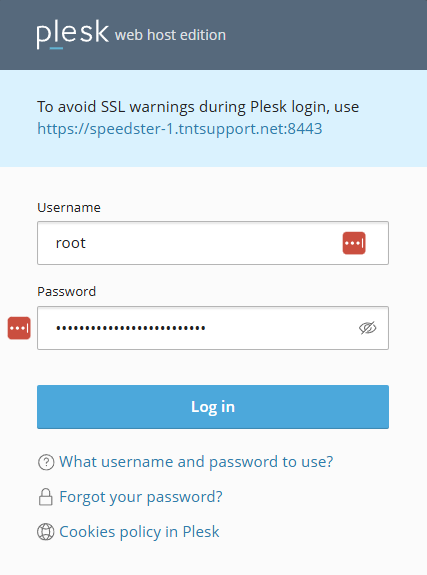
- Navigate to: https://174.138.44.12:8443/login_up.php
- Log in using your credentials.
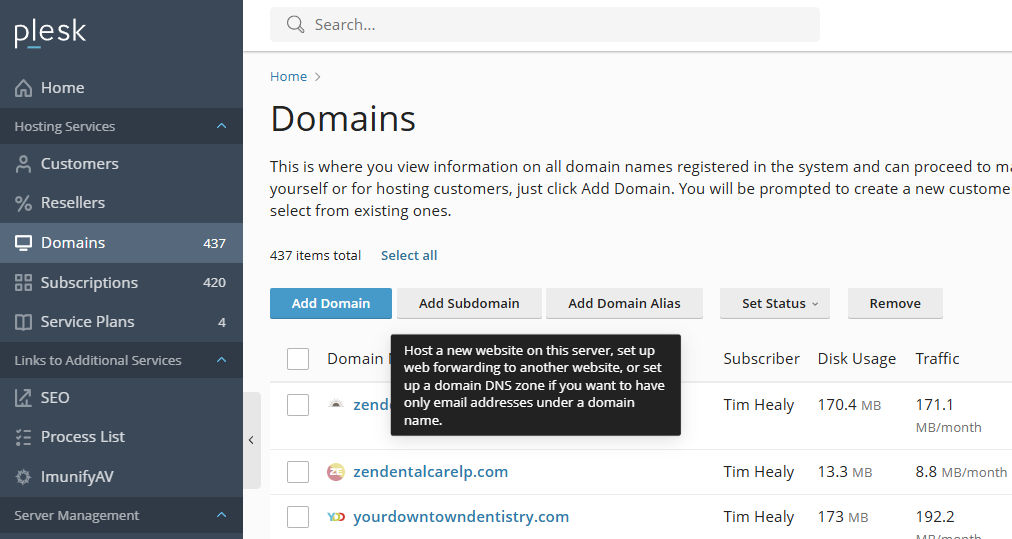
Add New Domain
Select Domains from the main menu and select “Add Domain.”
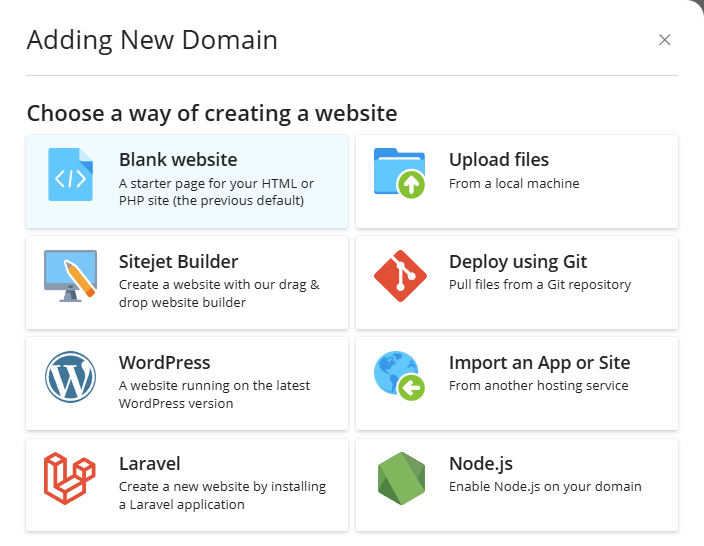
Choose Blank website as the setup option.
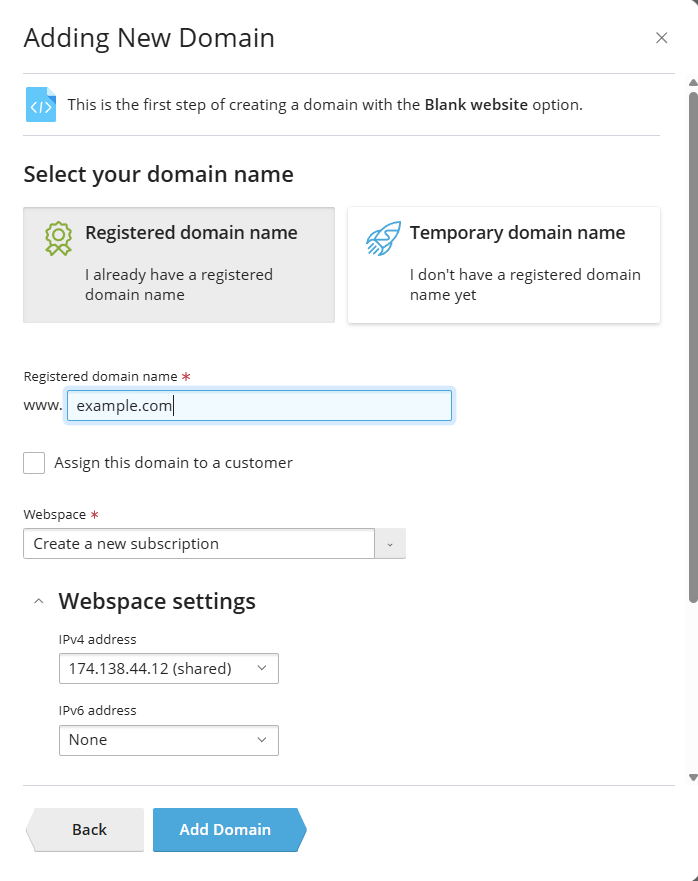
Configure Domain Settings
Type the name of the domain you are setting up under “Registered domain name” and click the Add Domain button.
System User Credentials

These are used to access hosted files over FTP and SSH.
Username: Note the default and copy it to Notepad.
Password: Click Show Password and copy it to Notepad.
Finalize Domain Addition
The system will now add the domain.
Navigate to Hosting & DNS > Select Hosting to complete the domain settings.
Domain Settings Overview
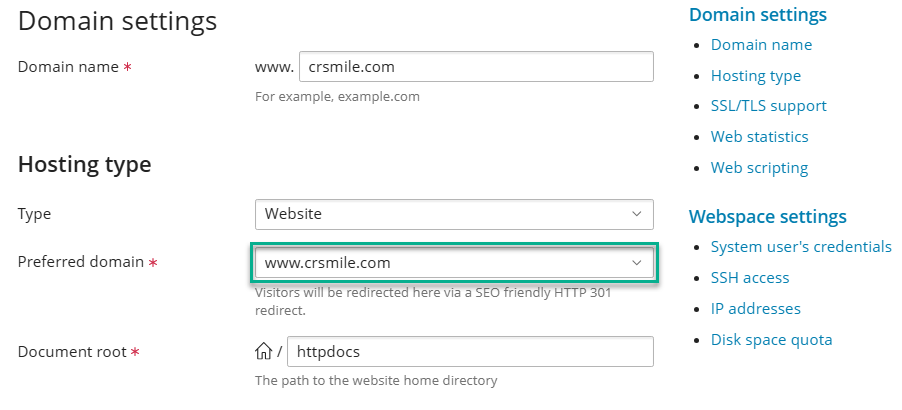
Verify the Domain Name is pre-filled as www.example.com.
Hosting Type should be set to Website.
Under Preferred Domain, select www.example.com.
Enable Security Features

Enable SSL/TLS support to encrypt connections.
Set up a SEO friendly 301 redirect from HTTP to HTTPS.
Certificate: Leave as Not Selected.
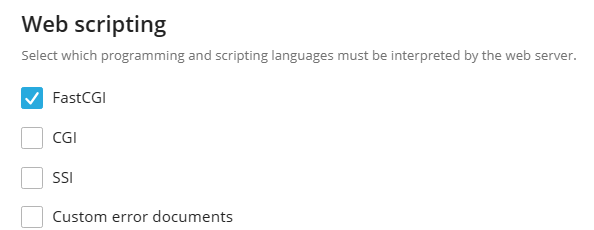
Web scripting
Select which programming and scripting languages must be interpreted by the web server.
Configure PHP Settings

Navigate to Dashboard > PHP.
Ensure PHP Support is enabled for version 8.2.18, running as FastCGI application served by Apache.
Click OK to save settings.
Apache & Nginx Settings

Under Apache & Nginx Settings
- Keep default settings for “Common Apache Settings”
- Leave “Additional Apache directives” blank
- Toggle “Proxy Mode”, “Smart static files processing”, and “Serve static files directly by nginx” with file defaults as shown below:
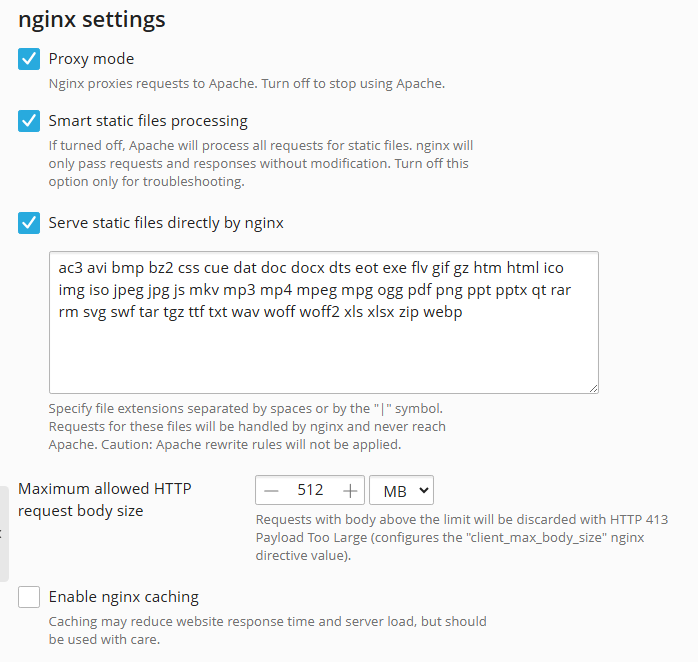
Copy and paste the code below for “Additional nginx directives” and click “OK”
# Caching and Compression
gzip on;
gzip_disable "MSIE [1-6]\.(?!.*SV1)";
gzip_proxied any;
gzip_types text/plain text/css application/javascript application/x-javascript text/xml application/xml application/xml+rss text/javascript image/svg+xml image/x-icon image/bmp image/webp image/jpeg image/png image/gif;
gzip_vary on;

# X-Content-Type-Options
add_header X-Content-Type-Options "nosniff" always;

# Handling versioned static files
location ~* ^(.+)\.(\d+)\.(ac3|avi|bmp|bz2|css|cue|dat|doc|docx|dts|eot|exe|flv|gif|gz|htm|html|ico|img|iso|jpeg|jpg|js|mkv|mp3|mp4|mpeg|mpg|ogg|pdf|png|ppt|pptx|qt|rar|rm|svg|swf|tar|tgz|ttf|txt|wav|woff|woff2|xls|xlsx|zip|webp)$ {
    try_files $uri $1.$3 =404;
    etag on;
    if_modified_since exact;
    add_header Pragma "public";
    add_header Cache-Control "max-age=31536000, public";
}

# Handling non-versioned static files
location ~* \.(ac3|avi|bmp|bz2|css|cue|dat|doc|docx|dts|eot|exe|flv|gif|gz|htm|html|ico|img|iso|jpeg|jpg|js|mkv|mp3|mp4|mpeg|mpg|ogg|pdf|png|ppt|pptx|qt|rar|rm|svg|swf|tar|tgz|ttf|txt|wav|woff|woff2|xls|xlsx|zip|webp)$ {
    etag on;
    if_modified_since exact;
    add_header Pragma "public";
    add_header Cache-Control "max-age=31536000, public";
}
Enable SSL Post-Domain Activation

Once the domain points to the IP address, go to Dashboard > SSL/TLS Certificate.
Click Install to set up a free basic certificate from Let’s Encrypt.
Ensure settings like Redirect from HTTP to HTTPS and OCSP Stapling are active.
Final Checks
Ensure all configurations are saved and verify the domain is functioning correctly.
