CMS Overview
The CMS drives all the pages that make up static websites, using templates for header, head, and footer content. Each site incorporates CSS, JS, and PHP. The CMS includes staging and live links, and automatically generates an XML sitemap for SEO.

The .htaccess file, located in the root, is crucial for maintaining SEO and must be correctly configured upon initial publication. Similarly, the robots.txt file, also in the root, needs to be validated during the initial launch.

The template head includes variables for custom meta titles, descriptions, and canonical links, such as:
<!DOCTYPE html>
<html lang="en">
<head>
	<meta http-equiv="Content-Type" content="text/html; charset=utf-8" />
	<meta content="$var(metaDescription)$" name="Description" />
	<link href="_ui.css" rel="stylesheet">
	<link href="styles.css" type="text/css" rel="stylesheet">
	<title>$var(pageTitle)$</title>
	<link rel="canonical" href="https://www.mysanjosedentist.com/$var(pageURL)$.html" />
    <meta name="viewport" content="width=device-width, initial-scale=1, maximum-scale=1, user-scalable=0" />
    <link href="https://tntwebsites.com/tnticons/css/fontello.css" rel="stylesheet">
Templates – Update the “Canonical” Tag
The default “canonical” located in the <head> of the Template requires a couple of important changes before pushing assets to the server.
Before
<link rel="canonical" href="http://www.$var(siteURL)$/$var(pageURL)$.html" />- Add the ‘s’ to
http://to make ithttps://for secure, encrypted connections. - Replace ‘$var(siteURL)$’ with the domain associated with the template.
- Save this Template
See example below for the domain – mysanjosedentist.com
After
<link rel="canonical" href="https://www.mysanjosedentist.com/$var(pageURL)$.html" />FTP Settings Checklist – Initial Launch
Website Environment
- Ensure the Website Environment is set to Production.
Staging URL
- Set Override all ‘index.html’ to ‘/’.
- Ensure Serve as https:// is selected.

FTP Settings
- Host: Confirm the Host is set to the server hosting the domain.
- Username: Verify the Username is correct.
- Password: Ensure the Password is correct.
- Directory: Confirm the Directory is set to httpdocs.
- Secure: Select Yes for Secure if SSL/TLS is required for FTP connections.
Click Save Settings to apply all changes.
Additional Notes
- Double-check all fields for accuracy before saving settings.
- Ensure you have the correct credentials and permissions to access the FTP server.
- Test the FTP connection to verify that all settings are correct and working properly.
Updating .htaccess

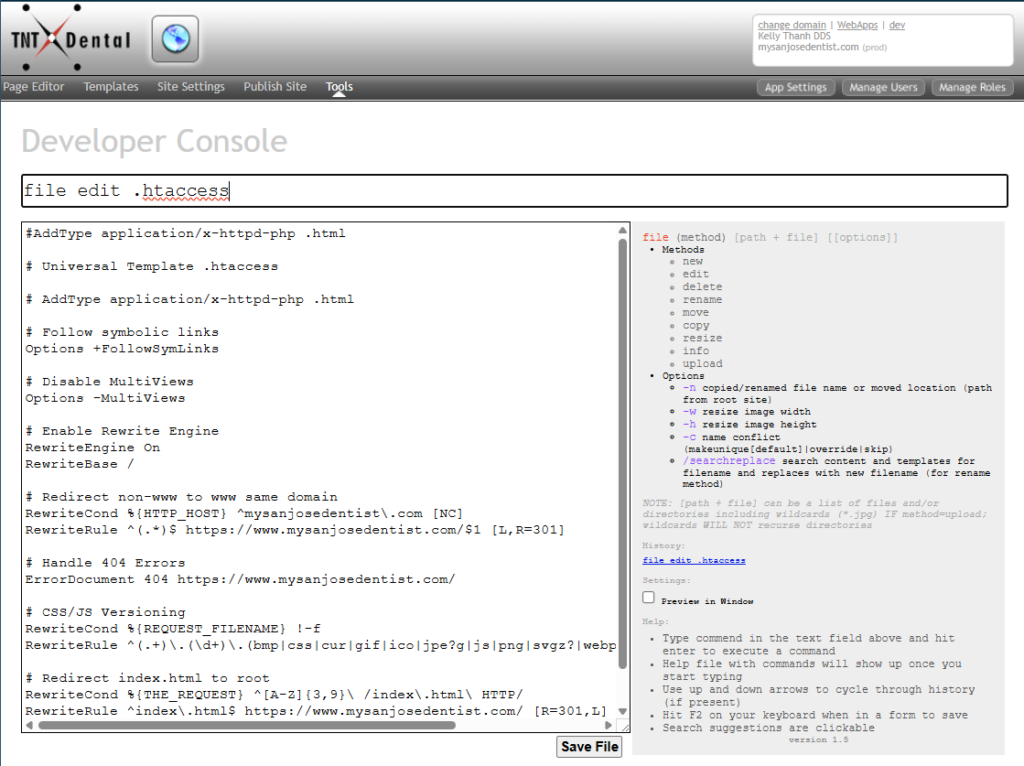
- Click Tools in the CMS menu
- Select Developer Console
- Type “file edit .htaccess’
- Enter
- Replace the current .htaccess directives with the updated directives and redirects
- Save File
Updating robots.txt
This one is relatively easy. You want to update the existing robots.txt file to point to the .xml sitemap for the main site and blog, assuming the blog is active.
- The first line will always be: User-agent: *
- Followed by: Sitemap: https://www.example.com/sitemap.xml
- Then the blog, typically: Sitemap: https://www.example.com/blog/post-sitemap.xml
Good Example – mysanjosedentist.com:
User-agent: *
Sitemap: https://www.mysanjosedentist.com/sitemap.xml
Sitemap: https://www.mysanjosedentist.com/blog/post-sitemap.xml
Accessing robots.txt
- Click Tools in the CMS menu
- Select Developer Console
- Type “file edit robots.txt’
- Enter
- Edit the current robots.txt directives with the updated directives
- Save File
Example: https://www.mysanjosedentist.com/robots.txt
Making it Live – First Push
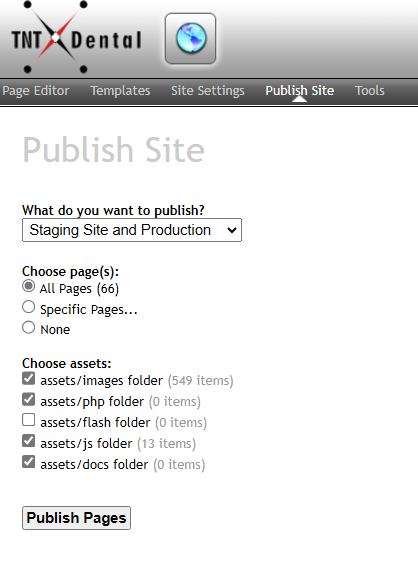
Once you are ready to push the site to the server, navigate to the Publish Site settings in the CMS.

What do you want to publish?
- Staging Site and Production
Choose page(s):
- All Pages
Choose assets:
- assets/images folder
- assets/php folder
- assets/js folder
- assets/docs folder
Click Publish Pages to push entire site to the server.
